As a game developer, one of the most important aspects of creating a compelling game is having an effective and challenging enemy AI. One way to achieve this is by using behaviour trees in Unity. In this post, we will explore the basics of behaviour trees and how they can be used to generate different enemy AIs.
And what are these so called trees?
Behaviour Trees are a way of modelling and controlling decision-making processes in a game. They are essentially a hierarchical flowchart that represents the AI’s decision-making process. Each node in the tree represents a decision, action, or condition that the AI can take. These nodes are connected to form a tree-like structure, where the AI starts at the root node and makes decisions based on the conditions and actions at each node until it reaches a leaf node.
Behaviour Trees are popular because they are easy to understand and modify, and they can be used to generate a wide range of AI behaviours. They are also flexible and can be easily adapted to different game situations and requirements.
Show me how to code those trees?
Great, let’s get started with some basic boilerplate code. I assume that you are familiar with coding concepts and can implement the remaining parts easily.
public class BehaviourTree : MonoBehaviour
{
    // Reference to the root node of the behaviour tree
    private Selector root;

    // Called when the behaviour tree is first created
    void Start()
    {
        // TODO: Create the behaviour tree nodes and set up the tree structure
        // root = ...
    }

    // Called every frame to update the behaviour tree
    void Update()
    {
        // TODO: Evaluate the behaviour tree starting at the root node
        // root.Evaluate();
    }
}
This code defines a basic BehaviourTree class that contains a reference to the root node of the behaviour tree.
// The base class for all behaviour tree nodes
public abstract class BehaviourNode
{
    // Called to evaluate the current node
    public abstract BehaviourNodeStatus Evaluate();
}
The behaviour tree nodes themselves are defined as subclasses of the abstract BehaviourNode class, which defines a single Evaluate() method that must be implemented by all node types.
// The possible return values for a behaviour tree node
public enum BehaviourNodeStatus
{
    Success,
    Failure,
    Running
}
The BehaviourNodeStatus enum is used to define the possible return values of a behaviour tree node.
public class Selector : BehaviourNode
{
private readonly List<BehaviourNode> children;
public Selector(List<BehaviourNode> nodes)
{
children = nodes;
}
public override BehaviourNodeStatus Evaluate()
{
foreach (var child in children)
{
switch (child.Evaluate())
{
case BehaviourNodeStatus.Success:
State = BehaviourNodeStatus.Success;
return State;
case BehaviourNodeStatus.Failure:
continue;
default:
State = BehaviourNodeStatus.Running;
return State;
}
}
State = BehaviourNodeStatus.Failure;
return State;
}
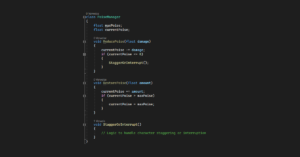
}This class serves as a node manager, keeping track of all our nodes, and functions as an OR logic gate, meaning it returns a success as soon as any of the nodes succeed. While we could potentially implement other nodes such as an AND logic gate or an INVERTER node, for our purposes the OR logic gate will suffice.
And how do I use all this stuff to make enemies do anything?
With all classes in place, we can now create different more stuff or rather more nodes that define specific behaviors for our enemy AI. For example, we can create a node that represents the behavior of patrolling a given set of points.
// Define the node for patrolling behavior
public class PatrolNode : BehaviourNode
{
    public override BehaviourNodeStatus Evaluate()
    {
        // Implement patrolling behavior here

        return BehaviourNodeStatus.Success;
    }
}
We can also define a behavior for attacking an enemy if they are within a certain range.
// Define the node for attacking behavior
public class AttackNode : BehaviourNode
{
    public override BehaviourNodeStatus Evaluate()
    {
        // Implement attacking behavior here

        return BehaviourNodeStatus.Success;
    }
}
So let’s modify the Start() method in our BehaviourTree script as follows to continuously evaluate our nodes:
private void Start()
{
    // create our nodes
    List<BehaviourNode> children = new List<BehaviourNode>();

    children.Add(new AttackNode(enemyToAttack, attackRange));
    children.Add(new PatrolNode(patrolPoints));

    // add child nodes to our root node
    root = new Selector(children);
}
If you implement the code discussed in this post and apply it to your enemy characters, you can create the illusion of characters patrolling an area and attacking enemies once they come within a specific range.
Bottom Line
In conclusion, behaviour trees are a powerful tool for creating complex AI behaviours in Unity. By breaking down behaviours into smaller, more manageable nodes, and combining them with logic gates, we can create versatile and robust AI systems that can adapt to changing game conditions. With some practice, you can create complex and varied enemy AI that will challenge even the most seasoned players. So why not give behaviour trees a try and see what kind of amazing AI behaviours you can come up with?